Learning Git Commands Through Video Game Mechanics
Introduction
Have you ever died in a video game and worried about losing all your progress? If you didn’t have a saved state, chances are you’ve smashed your keyboard in frustration 😶.
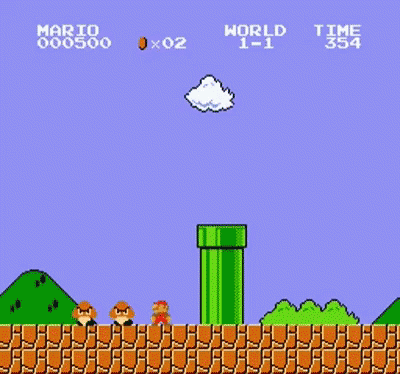
But if you did have a save point, you know how easy it is to jump right back in from the last checkpoint and keep playing like nothing happened 😎. That’s exactly what Git is for your code, a “save game” system that lets you rewind mistakes, experiment freely, and never fear losing hours of work again.
I’ve explained Version Control Systems from the ground up in my previous blog post, why they exist, the problems they solve, and how Git and GitHub fit into the picture, all using video game analogies to make things easier to understand. If you haven’t read it yet, you can check it out here:
Why Version Control Exists: A Video Game Perspective
What is Git?
I’ve already covered this in detail in a previous blog post, so let’s quickly brush over the key points.
Git is a local software you use to keep track of changes in your code.
It also keeps tracks of who made what changes (so you know who to blame 😉).
It also keeps track of every version of your project, meaning no more folders named
final,final_v2, orfinal_final😮💨.Git is a distributed system, which means every developer has their own complete copy of the project and its history.
You interact with Git mainly through the command line (or GUI tools… but where’s the fun in that?).
What Git is not?
Git is not an online platform.
Git is not GitHub. They are completely different things.
Platforms like GitHub are simply associated with Git and extend its functionality by providing:
shared remote hosting
an easy way to collaborate with others
Git itself works perfectly fine on its own, without the internet.
Demystifying Git Jargon

Repository
In layman’s terms, a repository refers to the source code folder that Git is tracking. We have to initialize Git within a folder, which essentially tells Git to start tracking all the files inside that folder and makes that folder a “repository”. Git adds a hidden .git folder inside it, where it stores everything, such as the complete history, metadata, and references to remotes, etc.
Commit
In our video game analogy, you can think of a “commit” as a “saved state”. It is simply a snapshot of your code at a given point in time. You can create many commits in a series, which basically build out a timeline of commits, allowing you to jump back to a specific commit whenever you want.
Commit Hash
Whenever you create a commit, a unique number is generated and associated with that commit like an ID. That unique ID is called a “Commit Hash”. It is a 40-character hexadecimal string.
HEAD
HEAD is a pointer that refers to the current commit you are working on. It simply represents your current position in the entire timeline of commits.
Staging Area
Before you take a snapshot of your new changes, or in Git terminology, before you “commit” your new changes, you first have to add them to a staging area. It is simply a convenience feature that allows you to review and prepare all the files before making a commit.
Branch
You know how many games provide multiple different save slots, so that you and your brother can both grind the story at the same time without conflicting with each other’s progress? Git has a feature like that too.
Git allows you to create several “branches”, which are like separate timelines of their own. Want to try out a new feature? Simply create a feature branch. If it works, merge it into the main branch. If not, delete it. Your original code remains intact in the main branch.
Main/Master
This is simply the default name of the base branch. Previously, it used to be called master. Now, it is called main.
Remote
A remote is a reference to another copy of the repository that is hosted at a remote location (usually GitHub).
Origin
origin is the default name Git gives to the main remote repository.
Git Workflow

Initialization: You initialize Git within your source code folder and convert your ordinary folder into a Git repository.
Staging Files: After adding, modifying, or creating new files, you stage them in the Git staging area.
Commit: After making sure you have staged everything properly, you commit the staged files, which essentially makes a proper snapshot of your code that you can return to if needed.
Installation
You can install Git by going to the following website and following the instructions as per your operating system:
After the installation, open up your terminal and run the following command to verify the installation:
git --version
If you do get a version number in the output, you’re in the clear!
Essential Commands
Initialize a Git Repository
This is the first command you need to type to turn a regular source code folder into a “git repository.” Once you type this command, you can then use the other Git commands to manage your codebase.
git init
Add Files to the Staging Area
Use the following command to add new or modified files to the Git staging area:
git add fileName1 fileName2
If you want to add all the new and modified files, you can simply run:
git add .
Commit Files: Save the Game
Once you have modified and added the files you want to save to the staging area, use the following command to make a proper “commit”, i.e., take a screenshot of the current state of your codebase:
git commit -m "some message here that describes the commit"
You can both add and commit in a single command using the -a flag. However, do note that this combined way only works for the tracked files, i.e., the files Git already knows about and is tracking. It won’t work for files you have added newly and are untracked yet.
git commit -am "some message here that describes the commit"
It’s just like saving your game and letting out a sigh of relief 😮💨, knowing you can come back to this point if you need to.
Retrieving Logs
You can see all the commits you have ever made in a Git repository by simply running the following command. It displays the commit hash, the author who made the commit, the date and time of the commit, along with the message.
git log
If you want to see a concise output with just the commit hash and the message, you can use the --oneline flag:
git log --oneline
If you want to see the logs in a graph timeline manner, you can use the --graph flag:
git log --graph
Status
The status command shows you the current status of your Git repository, such as the branch you’re on, untracked (new) files, files added to the staging area, modified files, deleted files, renamed files, etc.
git status
The -s flag can be used to display a more concise, short-format output:
git status -s
The output that you’ll receive with the -s flag uses the following status codes:
A  : Added
M  : Modified
D  : Deleted
R  : Renamed
?? : Untracked
!! : Ignored
Compare Commits
You can run the following command to compare two commits and check out the differences between them:
git diff commitHash1 commitHash2
You can also run this command without the hashes to simply compare your working directory with the last staged version (index). However, do note that this only shows the tracked files, i.e., the files Git already knows about and is tracking. It won’t show files you have added newly and are untracked yet.
git diff
Reset Your Changes: Load an Old Game State
Let’s say you messed some code up and want to restart from an old state, just like you would in a video game after dying. Don’t worry, all those commits you made are like checkpoints that you can time travel to with the following commands.
- Reset a staged file:
git reset fileName
- Reset all staged files (clear the entire staging area):
git reset
- Reset a defined number of commits:
git reset HEAD~1
- Reset up until a particular commit:
git reset commitHash
- You can also use the
--hardflag to reset and also discard all the changes in the working directory:
git reset --hard commitHash
Reset Changes by Creating a New Commit
There is another command called revert that resets the commits for you but also preserves the history. The following command will apply the inverse of the commit mentioned.
git revert commitHash
git revert over git reset, since git reset erases history, while git revert preserves it.Conclusion
Git might look intimidating at first, but at its core, it’s simply a powerful save game system for your code. It gives you the confidence to experiment, break things, and explore new ideas, knowing that you can always jump back to a previous checkpoint if something goes wrong.
My recommendation would be to start using Git for every project you create henceforth. Once you start using commands like add and commit to save your game 😎, and revert to restart once you mess your codebase up 😶, eventually they will become muscle memory to you!